Late October last year, my husband and I suddenly found ourselves moving to our current apartment. Ok it was not really sudden since we had to wait for the required 3 months notice (in Germany) before we could vacate our previous one. One moment, we were just talking about looking for a bigger space and then saw this advertisement in a website for rental apartments and decided to get a peek at the place. And I mean just a peek, because we just drove there and pass by the house (twice) since we didn't make an appointment at all, we were not all that serious yet about moving at the time. But when we arrive at the place, and seeing the quiet town with fields all around, plus the wide terrace attached to the house, well let's just say, we got serious about it. Moving from one to three-bedroom apartment needed a lot of work and it still does up to now, 6 months later. There are so many rooms and spaces to fill in and decorate! And we have to agree (or should I say disagree) about color themes or which furniture to get and, of course, the lamps for each rooms! Good thing, in the end we found something we both like or at least a compromise.
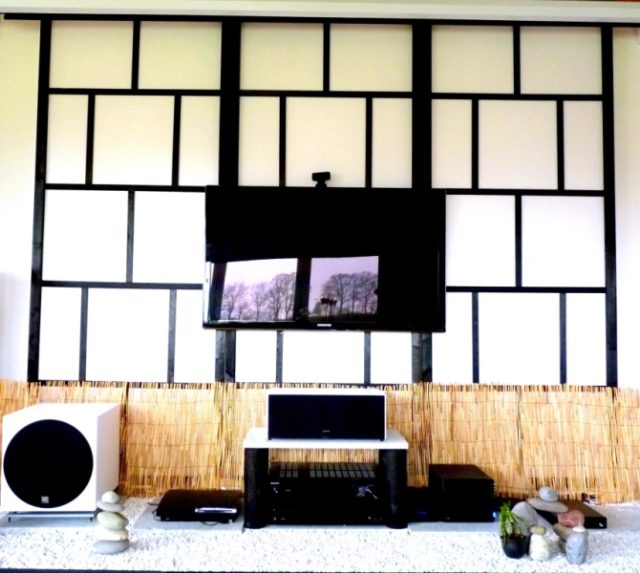
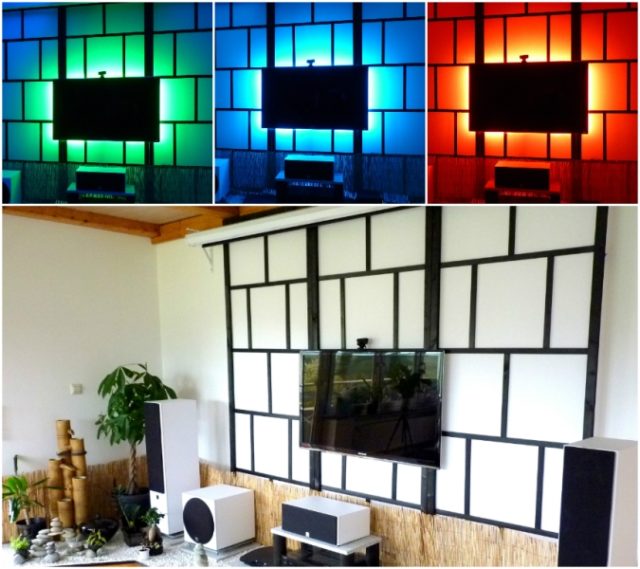
The biggest challenge we had, I think, was to come up with the TV wall design in the living room. We saw a lot of wall designs in the internet, like stone wall or wall panel but when we looked around, they are not just difficult to make on your own but also expensive. So we squeezed our brains out for other ideas and got inspired by our paravent (room divider) we got from Ikea that we used as headboard in our bedroom only a super-sized version! And the theme for the living room is born! I also made matching Japanese lamps, but more on that next time.
Here are the materials we used:
Wood cut into the following:
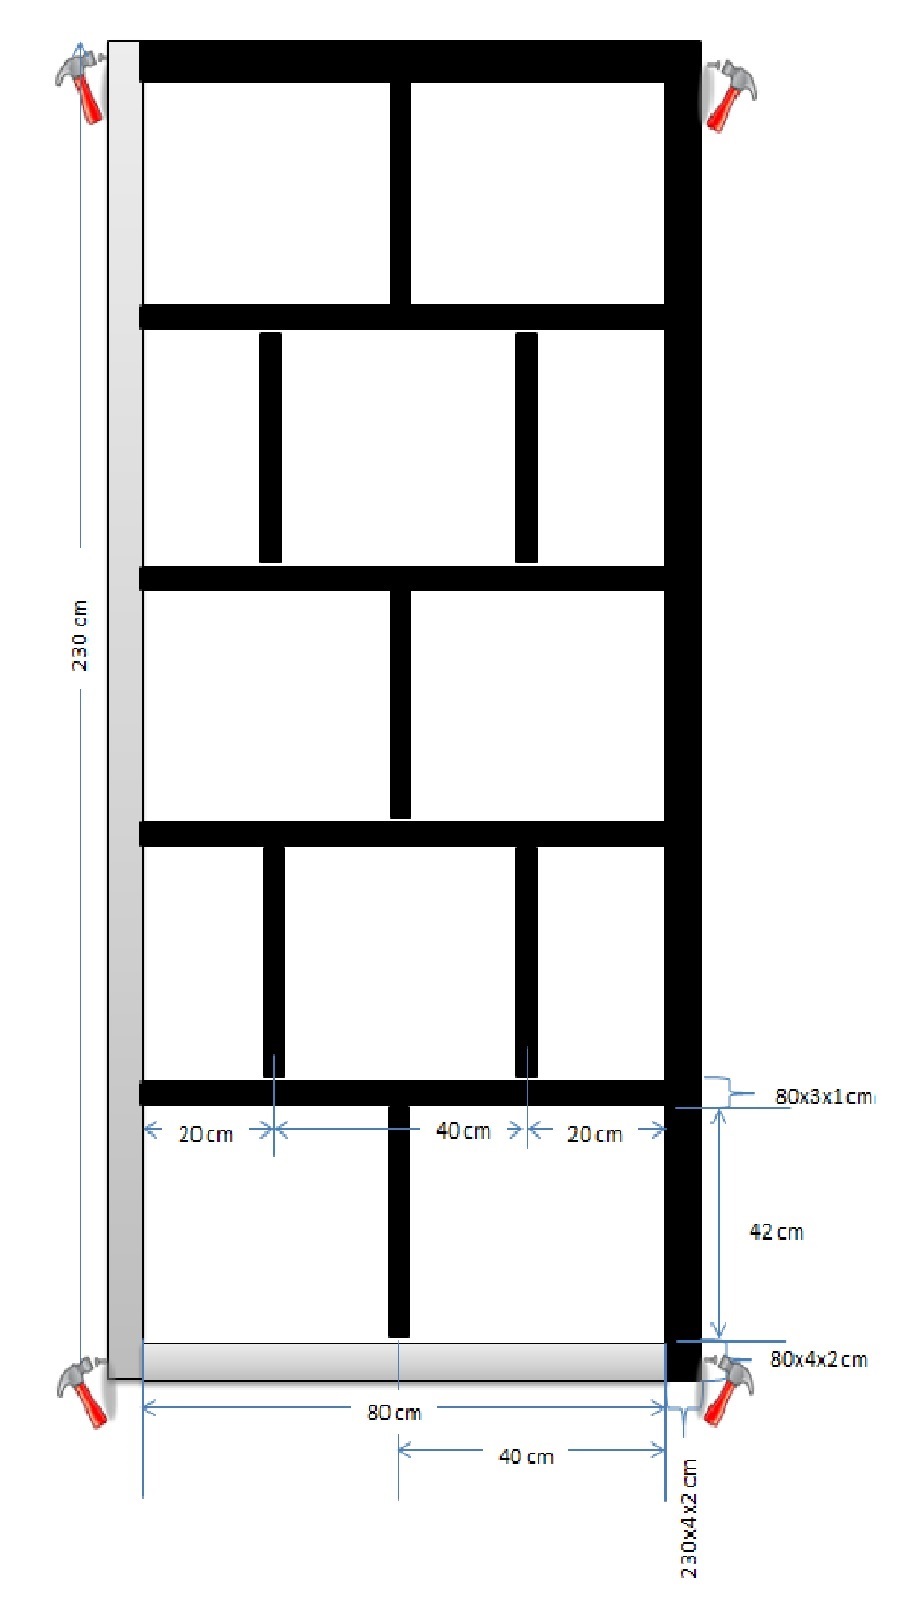
6 pcs 230x4x2 cm
6 pcs 80x4x2 cm
12 pcs 80x3x1 cm
21 pcs 42x3x1 cm
12 pcs Corner braces
12 pcs Square Bend Hook and 12 pcs Screw Eye
Wood Glue
Wood Stain-Black
Tools Needed:
Saw, Hammer, Staple Gun, Paint Brush, Sand Paper (if needed) , Cutter, Spray bottle with water

Step 1: Make the frame:
We bought wood that are already with smoothed surface and does not need to be sanded anymore, it might cost a bit more but not that much and worth the effort and time saved in sanding them ourselves.
Basically, this is the plan I made for the frame. Note that this is only one part of the whole frame. We made three of this. We assembled the frame by using corner braces to the back to connect the 4 corners of the main wooden frame. Originally, we were thinking of just nailing together, which will probably work, but the braces are easier and makes the frame firmer and not wobbly, plus, it does not show. Do not forget to add wood glue before fixing them.
Click here for the printable version of the Drawing Instructions.
Step 2: Paint the frame.
We chose to color the frame black as our living room has black and white theme. You can choose any color you like. A note though, make sure you do not paint the back side where the Japanese paper will be glued on later or else the paper might not stick to the wood. After painting let the frames dry.
Step 3: Attaching the Japanese Paper
There is really nothing to it. First, put some Japanese paper glue on the wood covering the whole surface where the paper is to be attached. Do it by section as the glue may dry if you do not work on it fast enough. Then starting from one end roll out the paper towards the other end. Make sure that the paper is evenly laid out. You do not have to think about it being a bit loose, this can be fixed later at the end with some magic, as long as it is flattened evenly. Once glued, cut the excess from the corners, if any, using a sharp cutter leaving only a centimeter from the edges of the wood uncovered. If the Shoji paper is not wide enough to cover the whole width (88cm) of a frame then do it by segment. We left the middle segment of the center frame without Shoji as this is where the TV will be mounted on the wall. Once done, spray the paper with water enough to make it wet but not like soaking then leave it to dry for some minutes to an hour. As it dries, the paper becomes tighter.
Step 4: Assembling
Now that all frames are done, it is time to hang them. Since we wanted to have this to be our TV wall to hide all those cables and wires, we needed a bit of gap from the wall so what we did was attached square bend hooks at the back of the frames long enough to serve as place holders and drilled screw eyes on the wall to hook them in. Place them on the left and right sides of each frame and about 20 cm from top and bottom edges.


What do you think?