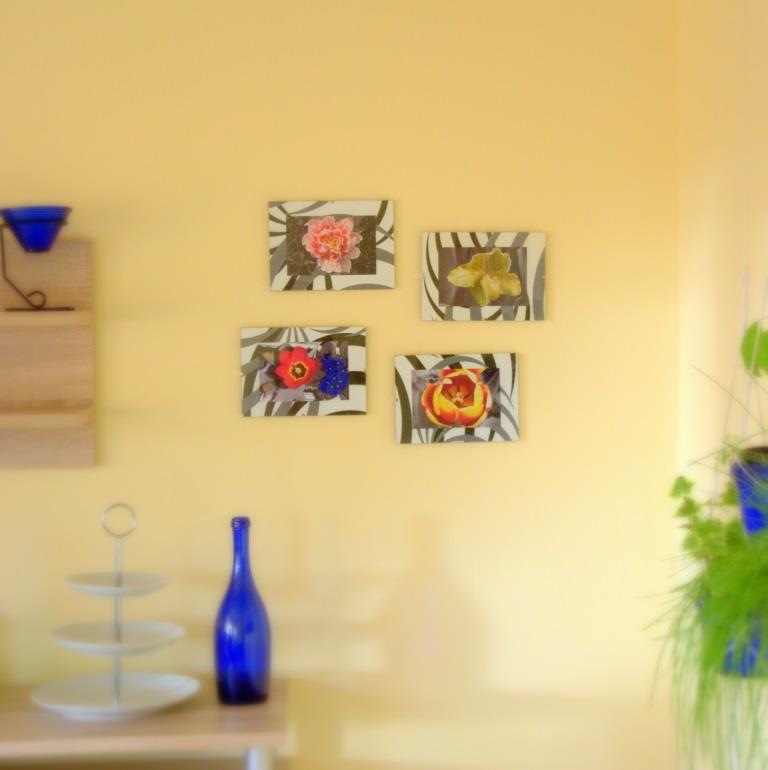
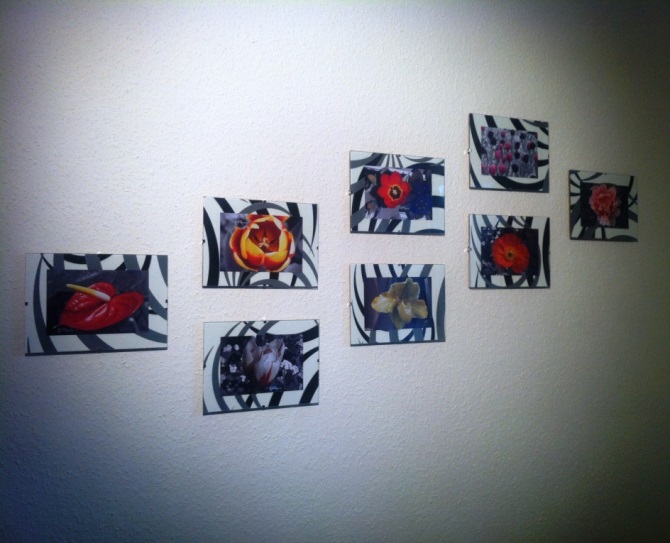
Here is another easy and inexpensive way to put some life to an empty wall - by creating a collage of pictures of your choice. You can use pictures that you've taken yourself and make them into a wall collage or use favorite pictures from the internet (be sure though that you are allowed to use them) and add a little personal touch.
My husband has taken some great pictures last time we went for a day trip to Insel Mainau one fine spring day and because I love flowers, this is the theme we agreed on for our dining room wall collage.
These are the things/tools you will need:
- Photo paper
- Decorative Paper
- Photo frames
- Nail & Hammer
- Computer and Printer
- Glue
- Cutter
Choosing the theme and the pictures.
First, of course, is deciding what theme you would like to have. Maybe you can use pictures of vegetable or fruits for a kitchen wall, or the pictures of places you have traveled to for your hall or stairway. Once you know which theme you want, it is easier to select the pictures that will be made into a collage.
Editing your pictures.
There are a lot of editing tools you can use online for free. For this project, I used Pizap because of a unique feature they have for cutting and inserting a picture on top of another, called the Cut Out Tool. It is also free. You will see this can also be used for making online collage that you can upload directly to Facebook, Twitter and Tumblr.
Step 1: Look for Pizap.com in your browser. Click Start and button then choose the EDIT PHOTO to begin.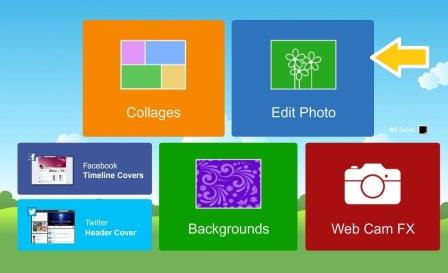
Step 2: Click the UPLOAD box and look for the folder where your chosen pictures are saved. Choose the first picture to edit. 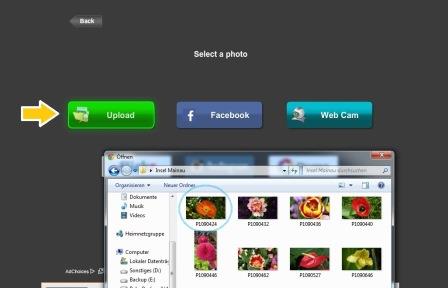
Step 3: Choose the effects you would like to apply to your picture from the right. I chose to have a black-and-white background to highlight the subject.
Step 4: At the top, there is an icon that will enable you to cut and insert picture, click it.
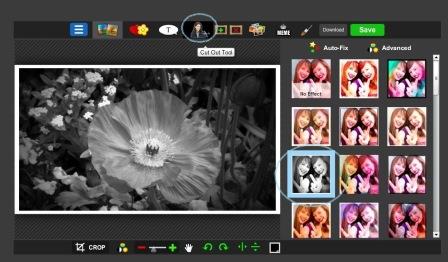
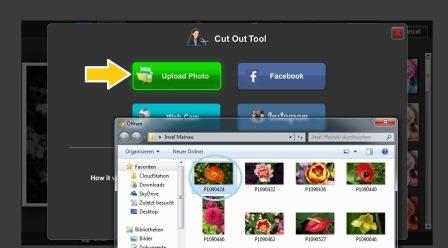
Step 5: After clicking the icon, a box will show where you can again upload another picture. Just click Upload Photo and select the same picture you used.
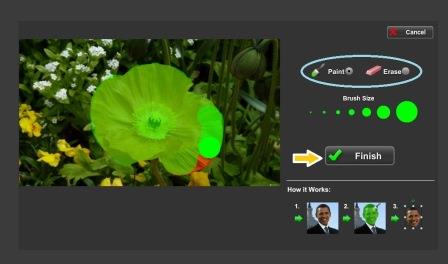
Step 6: Using the Paint brush with various sizes, highlight the area that you would like to keep that will be added to the first picture. If you make a mistake, you can choose the erase button and wipe the area with error.
Step 7: Click the FINISH button once done.
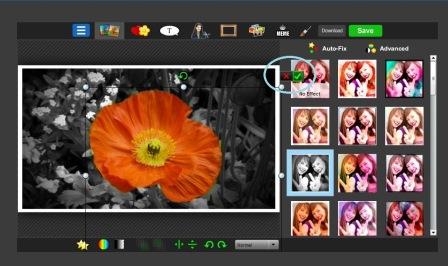
Step 8: The second picture will then be inserted to the original picture but you have to drag it into the right position. Once on place, click on the "check" icon.
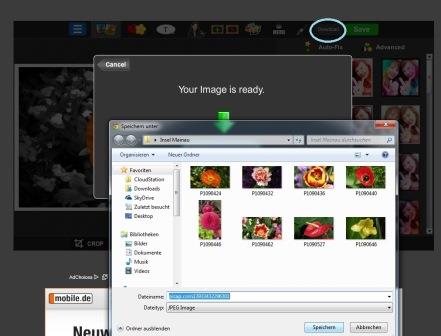
Step 9: Lastly, click the DOWNLOAD button on top to save the picture your computer.
Printing the edited pictures.
Using photo paper, print your pictures depending how big you want them to be. I printed mine in size 4R (10x15cm) because my frames are 15x21cm and I wanted to make some background design as a mat.
Preparing the Background.
I chose a paper with texture and have black, grey and white design. You can choose whatever you fancy. I then, cut the paper the same size as the frame. To have an easier and cleaner cut, I just lay the backing board (the material where the picture is attached) on top the paper and I used a sharp cutter blade and run it through the sides of the board. Next is I glues the back side of the deco paper to the backing board.
Assemble and hang.
Now all you have to do is attach the picture to the prepared backing board and then add the glass cover and seal the sides.
Using nails and hammer, I hanged the frames on the wall keeping them some centimeters apart. You can hang it anyway you want, tiled or mosaic style.












What do you think?