Create your own hanging strawberry planter!
This spring, I replanted my strawberries on a self-made hanging planter. From the original 6 plants I bought two springs ago, we now have more than 4 dozens of them. We are also planning to add other variety of strawberries so we can have them earlier as well. I saw some really cool ideas in the internet about strawberry planters. The ready-made pots are too expensive (for someone as practical as I am anyway) and some other DIY planters require either tools I do not have or too much work! I saw one that used a rain gutter, which seems practical if you have one lying around in the size you need. In the end I just created a strawberry planter from materials that are easy to get and work with and do not require too much labor.
Here are the materials I used:
4 Wood panel or Decking planks (250x10x1cm (LxWxH))
36 Common Nails (3D size)
Gardening plastic or any plastic for lining the planter box.
Rope, lenght depends where you plan to hang it but should be at least 1cm in diameter thick
Wood paint or glaze
Thin Wire (1 meter per planter box)
Tools:
Jig Saw, Hammer, Staple/Brad Nail Gun
, Meter Tape and a Pencil.
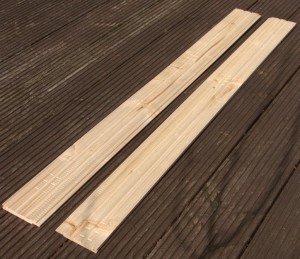
STEP 1: Measure and Cut
We chose wood panels measuring 250x10x1cm (LxWxH) because I wanted to have them 120cm long to fit exactly where I will be placed, with this length I can get 2 pieces in one panel. But I would suggest having a width not less than 10 cm or it will be too shallow. It does not have to be too deep as well. We bought a pack with 10 pieces of panels but I only used 3 pieces and a quarter to make 3 planters.
So measure and mark the wood with a pencil in the desired length, in my case, 120 cm and cut them straight using the saw. You will need a pair of this size for every box. This will serve as the sides (front and back) of the box.
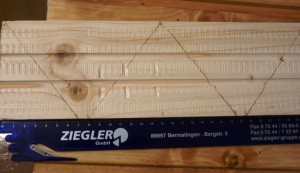
Now for the ends, get another piece of a wood panel and from one end measure 15 cm and mark both on top and bottom then on the bottom measure and mark also 7th and 8th cm. From top end (Ocm) draw a line across to the bottom (7th cm) and from the other top end (15th cm) another line going to the bottom (8th cm).Repeat this starting from the 15th cm. Cut the wood following the lines you made. You will have made 2 pieces of this cut. Do not throw away the triangle scrap from the middle. You can use that as a divider in the middle and will make the boy firmer if you made a long one like I did.
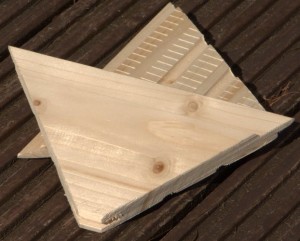
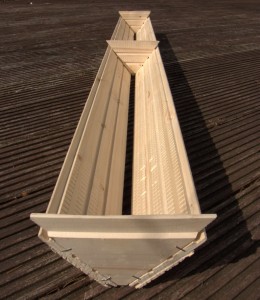
STEP 2: Put the puzzle together
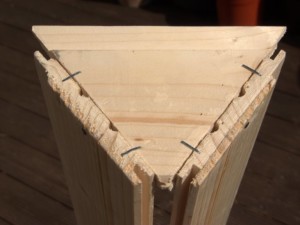 Nail the side panels to the end panels using 2 nails each side. Then measure the middle of the box and attach the middle divider using also 2 nails each side, you will be using 8 nails for all the ends and 4 more for the middle divider. It would be easier if someone can help you to hold the wood so it would not move when you start hammering. As my husband was away when I did this, I just used wood glue and let it dry first before I nail them together. Use the staple gun for the other sides to make it more secure.
STEP 3: Painting or glazing
It is better to paint your box now as paint will protect the wood from water and will make it last longer. I was a bit impatient, so I skip this step because we forgot to buy the paint when we bought the other materials and I was too excited to work outside in the nice spring weather.
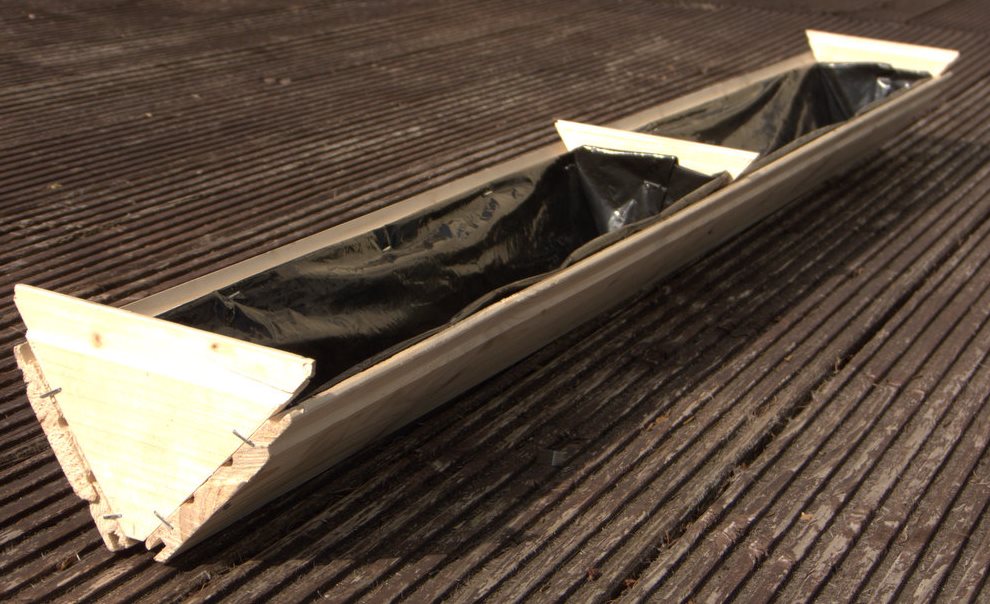
STEP 4: Lining
Line th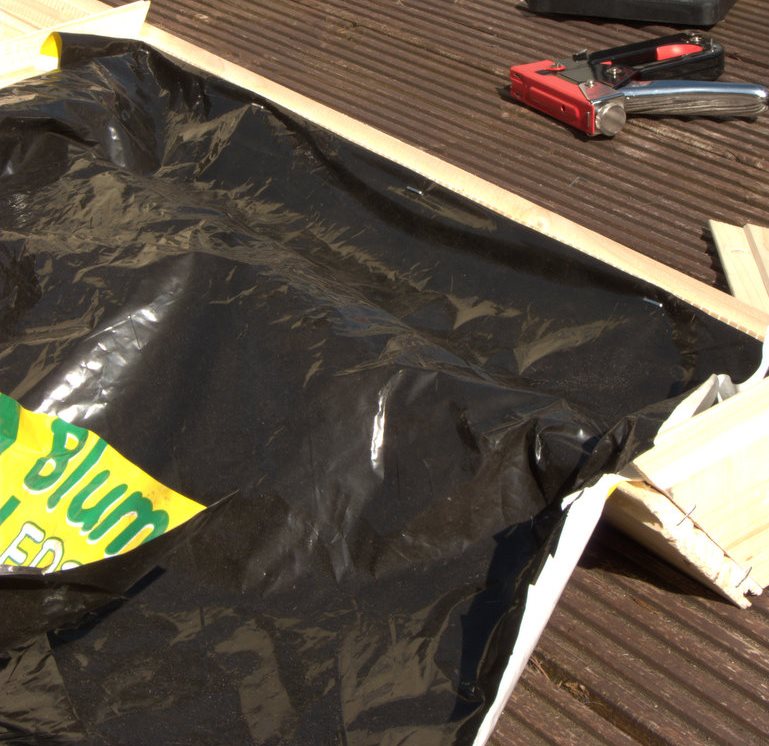 e wood with garden plastic from inside and secure it using the staple gun, not only will it protect the wood from the wet soil when watering, it will also help hold moisture longer plus it will keep the soil from filtering through the gap. As a believer of recycling, I didn’t buy a garden plastic and only used the empty plastic bags from garden soil I kept from planting earlier.
STEP 5: Tying Knots
Depending on where or how high you are planning to hang your strawberry planter box, cut 2 ropes in the same length. Now get the middle point from one end of the box to divider make a small hole on the plastic, insert the rope through the hole and from the bottom side of the box tie a knot at the end of the rope making sure that the knot is big enough that it will not pass through the gap and really firm so it will not become loose. Double or triple knot if needed. Do the same on the other side.
To make a 'double deck' of planter box, tie another batch of knots on each rope about 20-25 cm from the top of the first box. Make identical holes on the next box and insert the rope though the holes.
Now use the thin wire to make the box stand straight when hanged. Pull the rope upwards making sure it is in the middle position then fix the end of the wire around the rope. It should be on the level of the box’s top surface. Then drape the wire downwards halfway around the box and coil it firmly twice around the rope just above the knot then continue on the other side until it reach the rope on top again and fix it firmly so that the rope stays in the middle on not leaning on the sides when hanged. Do the same on the other side.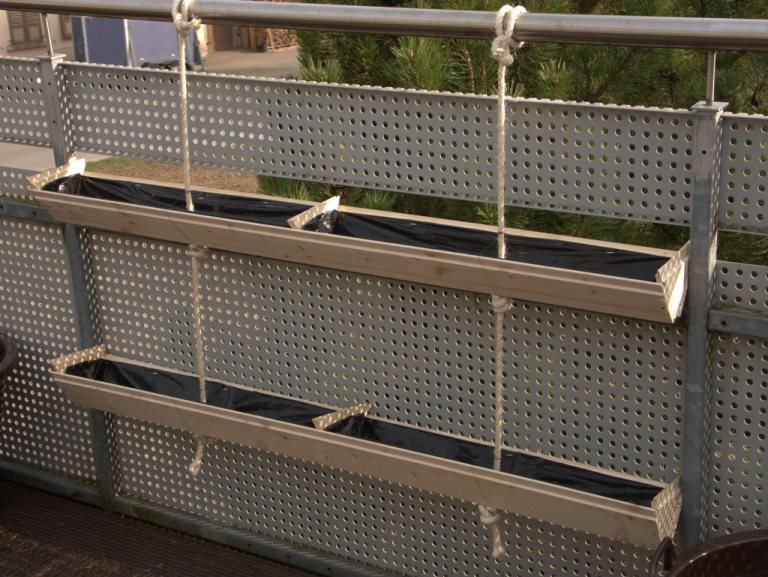
STEP 6: Hang your strawberry planter box.
Make sure that you tie the rope firmly. Using a stick, poke several holes on the bottom of the plastic to serve as drainage. Your strawberry planter box is now ready!!! You can also read here instructions and tips on Growing Strawberries. Enjoy gardening.
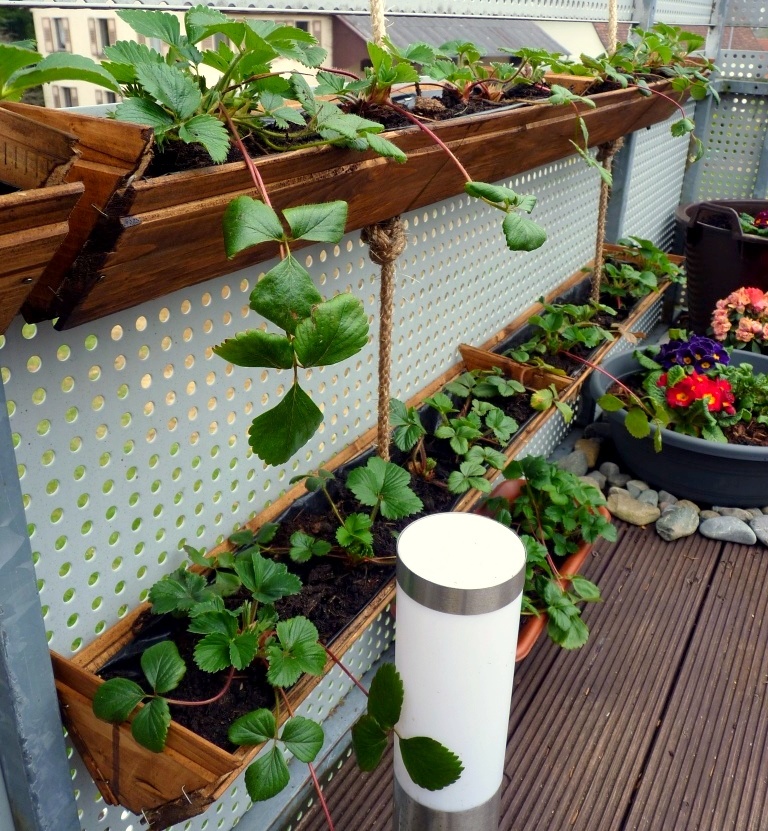
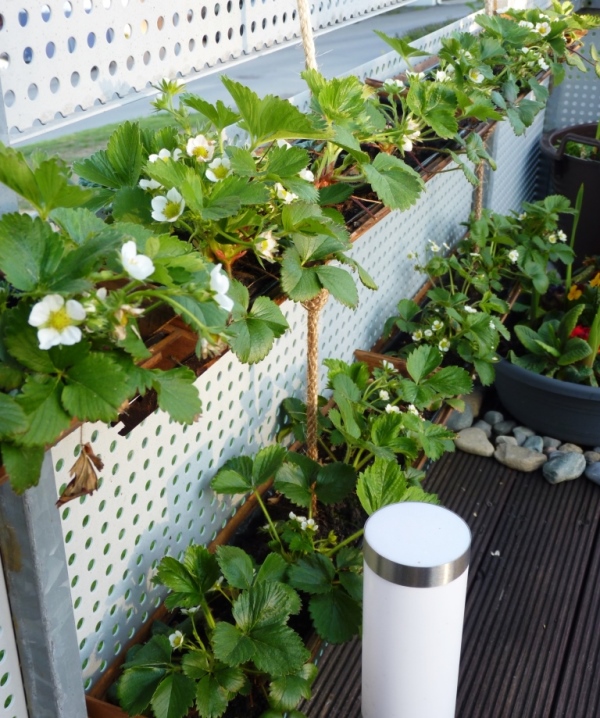
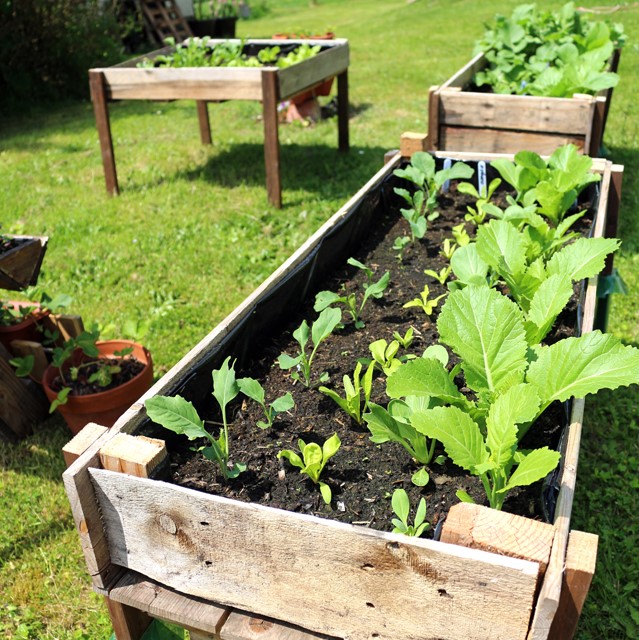
Update (May 11, 2014)!!!
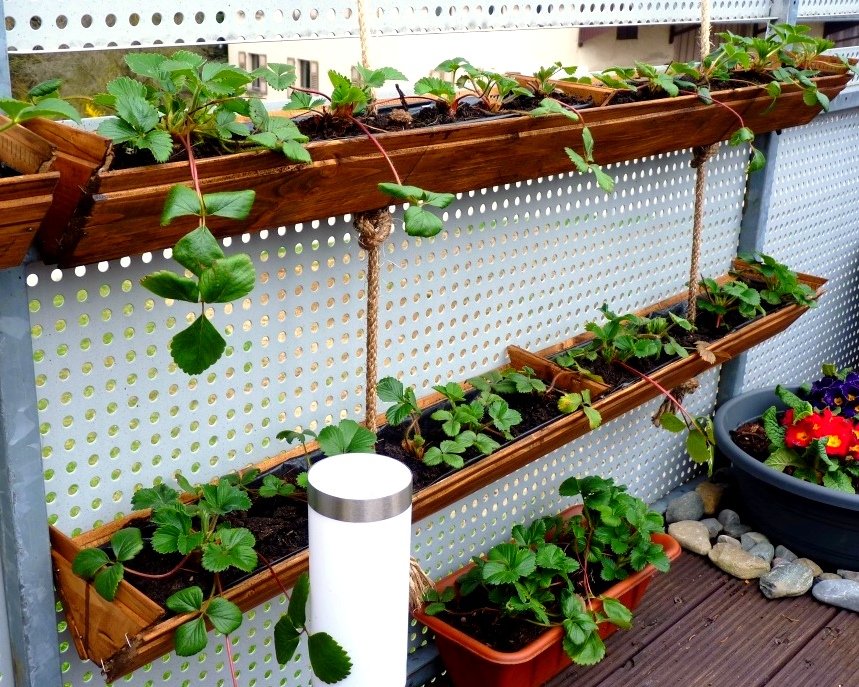
Here is a photo a month after replanting and transferring my strawberries to the Strawberry Planter I made! They must like their new home, right? They look happy and are blooming profusely! I also updated my previous article on how to grow strawberries in container for additional tips.
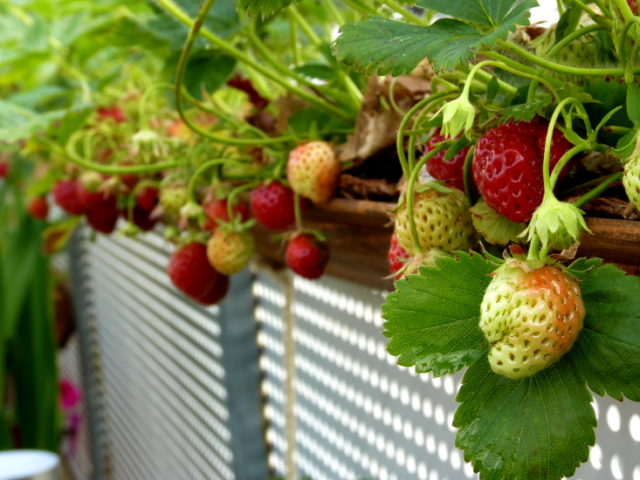
Update (3 August, 2014)!!!
Here is another photo taken last June when most of the strawberries ripe for the picking.


Alex says
Thanks. A very good idea. Where do you store the boxes in the winter?
Bebs says
Strawberries are winter hardy. I used to lay them all together on our terrace during winter and cover with some mulch. Just check that the soil does not get too dry before and after the snow comes and they should survive.
Mayli says
Thanks! I will wait for more photos.
MAYLI says
I really like your hanging strawberry planters, but not quite understand the part of thin wire, is there any pictures you could show me? Thanks a lot!
Bebs says
Hi Mayli, unfortunately I cannot take a photo of it at the moment as we are in Italy for vacation, but I can send you some when we get back. But if you look closely at the photo in Step 5, where the knots on the ropes are, you can see wires tied around the planter box and also wound around rope. The purpose of the wire is to keep the box straight up and not prrevent it from toppling on the sides. You can also rope of course.