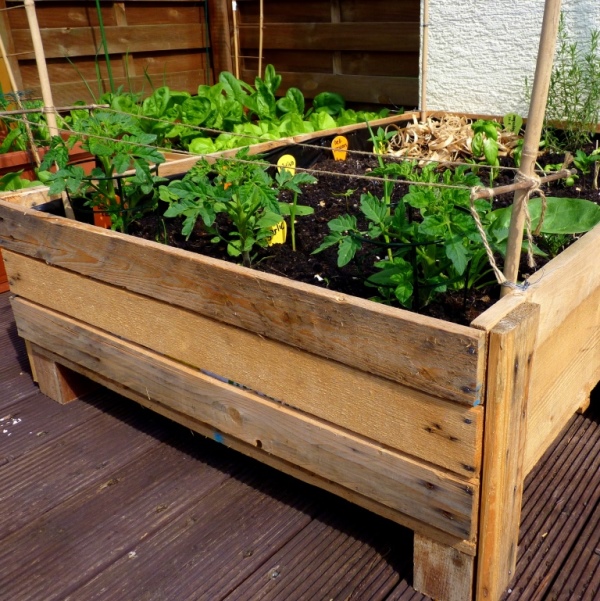
I love planting and gardening, but the problem is we do not have a garden! We do have a wide terrace though and the best solution I find is container gardening. Although it would be nice to plant directly on the ground, growing plants in pots or containers do have its own advantages, like it requires less or no weeding at all and the ease to move or rearrange pots anyway you like it or as the plants require (shade or sunlight at different seasons). There is also lesser hassle from garden invaders like slugs and other pests and diseases are easier to isolate and control.
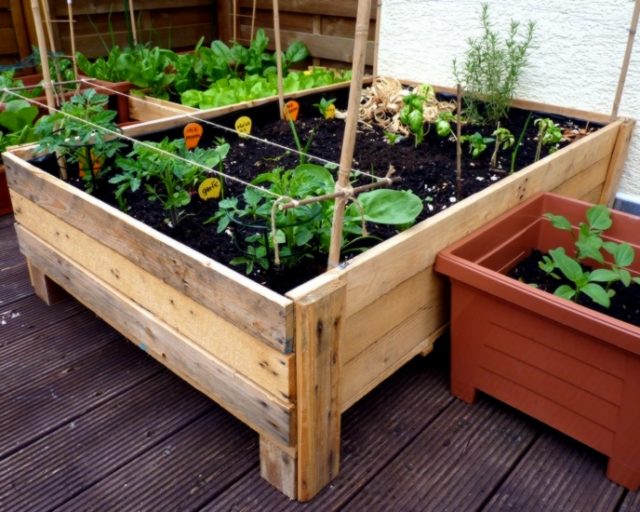
We already planted some trees and berries individually in big pots but I also wanted to have some vegetables and for this I made some planter boxes from wooden pallets. It is really quite easy and cost us...nothing! Yup, hubby was resourceful and got the pallets for free and I just used re-purposed and scrap materials for the other things we needed.
Update! May 15, 2015
Wanna know what vegetables and herbs I was and am able to successfully grow on this planter box and other containers? Read here for easy to grow vegetables in containers.
Here are the materials I used:
3 pallets
nails
chicken wire
plastic bags from soil
Tools:
Jig Saw, Hammer, Staple/Brad Nail Gun, measuring tape, pencil
Instructions:
1. Dismantle 2 pallets and remove the nails. Try not to split or destroy the wood while tearing the pallet apart . I found this video on how to properly dismantle a wooden pallet. You will have 2 sizes woods. The shorter ones should be 6 pieces and the longer ones depends on what pallet you got, I got 10 pieces (5 each pallet) but I only used 8.
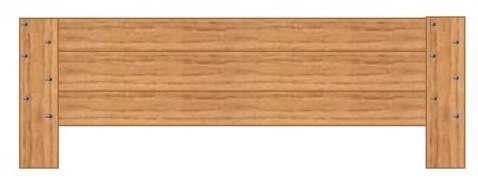
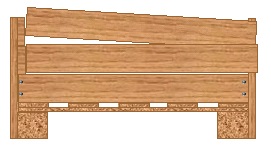
2. I used the 3rd pallet as the base and 3 shorter woods for each of the short sides and 3 longer ones for each of the other sides. But first I measured from the base of the foot up to the intended height of the planter box. Using this measurement I cut 4 pieces of this size from the excess wood slabs. Align 3 of the long wood on a flat surface and place one of the cut wood perpendicular on top at the end corner and nail them together. Do the same on the other corner and repeat this to the other 3 long wood. See illustration below.
Of course cutting wood is so much easier using a Jig Saw like this one:
Armin got me one and I looove it! So handy and I was done in no time.
3. When this is done, nail them to the sides of the base pallet from the feet.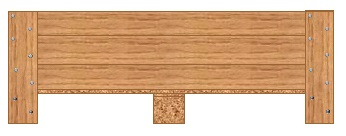
4. Then nail the shorter woods on the end corners of the longer woods on both sides.
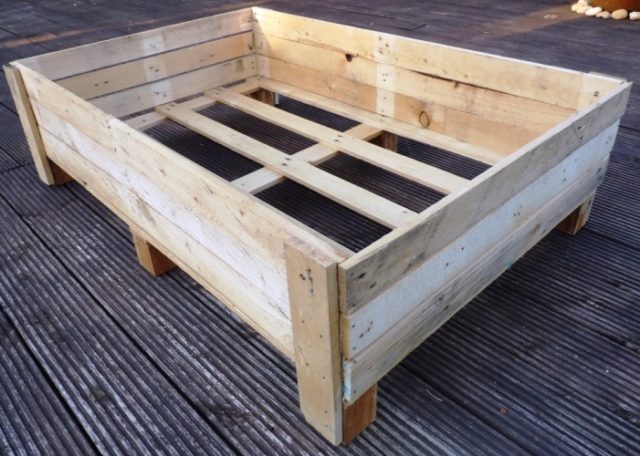
Mine looks like this at this point:
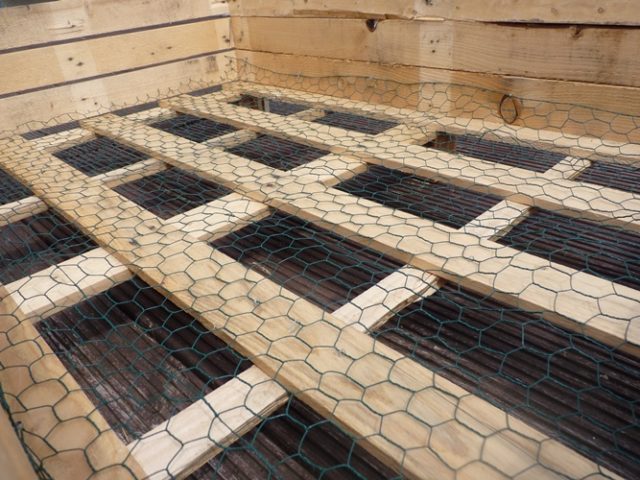
 5. Using staple gun, I tacked the chicken wire at the bottom of the planter box to provide more support when I fill it in with soil.
 6. I kept the plastic bags from the bags of soil we bought earlier for planting the trees and berries and now I can use it for lining my planter box. I also used the staple gun to fix the corners and sides to the wood. Do not forget to poke or cut some holes as drainage.
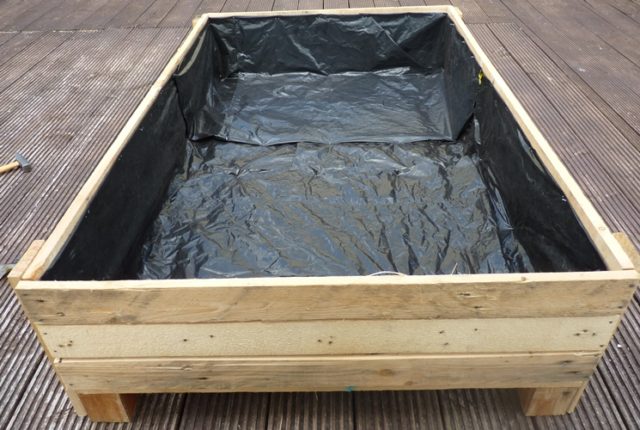
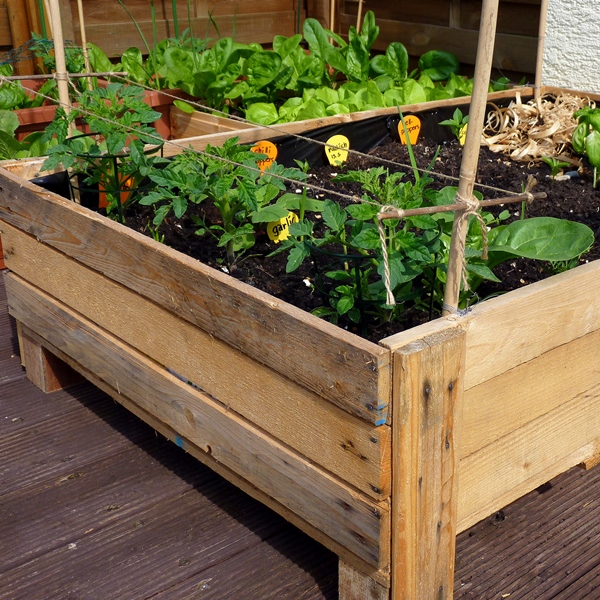
Your planter box can now be filled up with soil and waiting to be planted on!
Update (3 August, 2014)
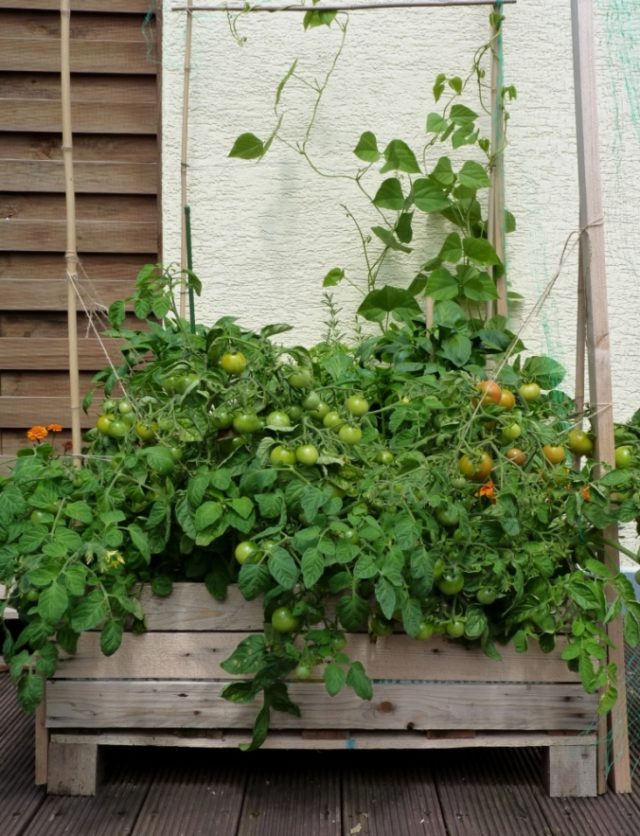
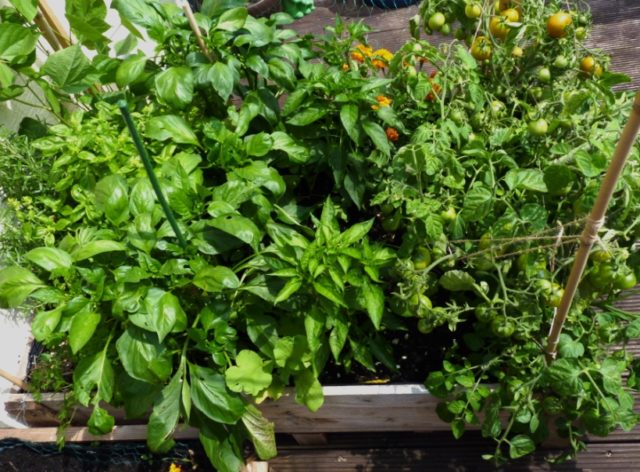
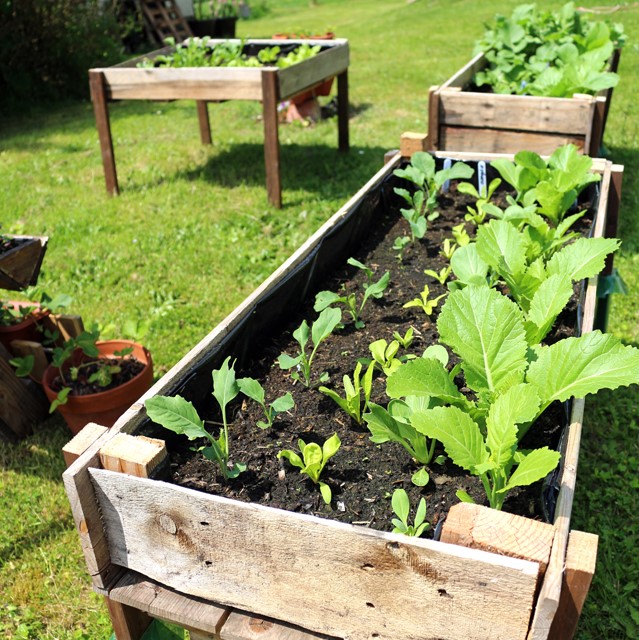
Here are the latest photos from my vegetable planter box. As you can see my vegetables are thriving well. In this box I planted several different vegetables and herbs like tomatoes, garlic, chili, bell peppers, basils, parsley, rosemary and beans.





Jc says
Hi Bebs! Your container gardening looks lusciously green and healthy. Do you have any tips in growing greens and veggies when it comes to fertilizing them? I have just got my tomato seedlings and french fillet beans planted and I wanted to make sure they will grow healthy and not die on me. Any gardening tips will be appreciated!
Thanks in advance,
Jc
Bebs says
Thanks a lot JC! About your question, I do not think you have to worry so much about the tomatoes as they are really usually easy to care for. They like to have lots of sun but if you are planting them on containers as well you have to water them often, like daily. Water direct to the soil or roots. As for fertilizer, I just used a balance one (actually for all my veggies), like 10-10-10 (NPK) before planting and once they start to form fruits like every month thereafter. Remember that lesser is better than over-fertilizing.
Have fun with gardening!
Kristin says
Great, great!! Am hopefully moving into a new flat in lovely Sevilla, Spain, in two months and will have a huge terrace. Your tutorial seems excellent. Fingers crossed I will manage to do my part... 🙂
Bebs says
Ooohhh..Spain!!! I think you will have lots of sun, or least a lot more than we have in Germany! Your plants will love it! I wish you luck with moving and with your container garden plans!
Milly says
I'm wondering what kind of soil you used. Is it potting soil or garden soil?
Bebs says
I used potting soil (the cheapest I got) for my container garden since that is all that is available to me. I left it in the box during the winter and now I planted new veggies in it. At the moment I have garlics, radishes, parsley, pak choi and spinach growing in it. 😉
Treana B says
Thanks so much for linking up to the Merry Monday Link party. This is such a great project-- especially as I am trying my first round of gardening ever this summer!!! 🙂 Hope to see you next week. - Treana
Bebs says
Hi Treana, I am glad you like it and goodluck with your garden, I know you will have lots of fun. Will be seeing you again!
Karen says
This is such a great and thrifty way to create container gardens. Those pallets are so easy to come by and have untold numbers of uses. Adding this one to the list! 🙂
Bebs says
Hi Karen! Nice of you to stop by and thanks for your comments. I checked your blog and enjoyed reading it, specially the "About" and "My Family" pages! What a wonderful family you have! Will be visiting more!